
First Recording Troubleshooting: Fix Silence and Noise
 By HenrikUpdated Jul 29, 20266 min read
Make your first system-audio recording dependable: check the right device, prevent notification sounds, test playback, and diagnose common failures.
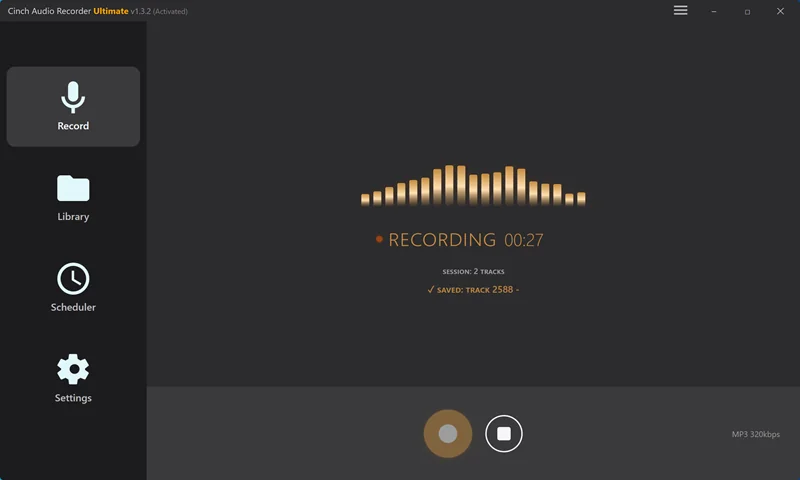
The first recording is a test of the setup, not a time to capture a two-hour programme. Record ten seconds, play it back, and only then start the real session. This one habit catches most silent files, wrong-device captures, and notification sounds while they are still easy to fix.
Use this guide for audio you are allowed to record. It is about checking a Windows playback and capture path; it is not a way to bypass protected playback or platform rules.
If you are preparing for a long session, use the test recording preflight guide after this page. It expands the first test into a source, folder, format, quality, and playback checklist.
If a session records correctly for a while and then stops early, use the recording stops unexpectedly checklist to check sleep, power, storage, playback pauses, and device changes before changing recorder settings.
The First-Test Routine
Before opening your recorder, decide exactly what should be heard in the final file. Is it browser audio, a music app, a webinar, or your microphone plus system sound? That answer determines the capture method.
Then use this routine:
- Connect the speakers or headphones you will use for the whole session.
- Start a familiar source with clear audio.
- Turn on Windows Do Not Disturb and close apps or browser tabs that may make a sound.
- Open the recorder and select the active playback device or its matching loopback path.
- Record ten seconds.
- Stop, play the saved file, and listen with headphones if possible.
- Check the output folder before you begin the full recording.
Do not switch from speakers to Bluetooth headphones after the test. A device switch can leave Windows playing through a different endpoint from the one your recorder is capturing.
If the File Is Silent
Treat silence as a routing question first. Do not reinstall drivers or change several settings at once.
1. Confirm Where Windows Is Playing
Look at the Windows volume control while your source is playing. Confirm whether the sound is going to laptop speakers, wired headphones, Bluetooth headphones, a monitor over HDMI, or a virtual device. This is the endpoint the recorder needs to follow.
If you use Audacity, select the Windows WASAPI loopback input that matches that output device. If you use Cinch, check the Recording Device setting and make another short test. If you use a virtual cable or mixer, confirm that the source is routed into the virtual device and that the recorder is listening to the same route.
For the full decision tree, see how to record internal audio without Stereo Mix. It explains when a free WASAPI setup, virtual routing, or a dedicated recorder fits the job.
2. Check for a Device Change
Bluetooth reconnections, unplugged headsets, docks, and HDMI displays can change the active output without much warning. If the test worked earlier but a later recording is silent, reconnect the intended device, reopen the recorder if needed, and repeat the ten-second test.
3. Separate a Capture Failure From a Source Limitation
Test with another ordinary source that you are permitted to play. If one source records but another always produces silence, do not assume the recorder is broken. Some playback paths can be restricted or behave differently. Use an allowed source and respect the provider’s terms rather than treating the problem as a setting that must be defeated.
If You Hear Notifications or the Wrong App
System-audio capture can include everything played through its selected path. That is why an email chime, a meeting reminder, or a second browser tab can show up in an otherwise clean recording.
Before the real session:
- Turn on Do Not Disturb.
- Close chat, meeting, mail, and social apps.
- Pause tabs that may autoplay.
- Avoid games, system updates, or calls that can take over the audio device.
- Make a short test after changing volume, headphones, or output routing.
If one alert was recorded, do not assume a volume booster will remove it cleanly. Listen to the affected section first. You may be able to cut a clean gap or use the Audio Silence Remover for genuine silence, but re-recording is often the better answer when the sound overlaps music or speech.
For a dedicated prevention checklist, use the recording catches notification sounds guide before the next take. It covers Windows alerts, browser tabs, chat apps, Bluetooth reconnect sounds, and when editing is realistic.
If You Cannot Hear the Source While Recording
This happens most often with virtual audio routing. The recorder may be receiving the stream correctly, but your real headphones are no longer receiving it because Windows is now sending sound into the virtual cable.
Stop and restore monitoring before recording anything important:
- Confirm the source is routed into the virtual device.
- Confirm the recorder listens to that virtual device.
- Configure the routing tool to monitor the source through your real speakers or headphones.
- Make another ten-second test and play the resulting file.
If you do not need custom app-to-app routing, simplify the setup. A normal Windows loopback method or Cinch Audio Recorder is usually easier for straightforward browser or music playback. The streaming-audio recording guide compares those approaches.
If the File Splits, Stops, or Sounds Wrong
First identify the symptom, then change one setting at a time.
| Symptom | Likely place to check | Safe next action |
|---|---|---|
| Several tiny files | Short-clip, minimum-duration, or silence settings | Keep the useful fragments, then adjust the setting and repeat a short test. |
| A recording stops after headphones disconnect | Active output device changed | Reconnect the intended output and select it again before retrying. |
| Audio is too quiet or distorted | Player volume, output processing, or capture level | Return to a moderate source level and test; do not normalize a clipped recording as a first fix. |
| One long file has unwanted sections | Source pauses, ads, or other system audio | Review the file, trim only clean boundaries, and control the environment before retrying. |
Once capture is stable, use the recorded-audio cleanup guide to choose an output format, check metadata, and decide which fragments to keep or merge. The Recording Quality Checker is also useful before applying normalization or compression simply because a file sounds different from the original source.
When to Ask for Help
Contact support after you can describe one repeatable test: your Windows version, the playback device, the recorder setting, the source type, and what happened to the ten-second file. That gives the support team something actionable.
Use the Cinch support page for product help. If you have not installed it yet, the download center is the current place to check available installers. For a music recording that works but needs better titles, artwork, lyrics, or file naming, the Cinch Audio Recorder product page explains the Library and metadata tools.
The One Rule Worth Keeping
Never start a long recording before a short recording has played back correctly. A ten-second test is faster than repairing a silent, noisy, or wrongly routed file later.