
How to Test an Audio Recording Before a Long Session
 By HenrikUpdated Aug 7, 20267 min read
Use a short preflight recording to check source audio, device routing, volume, file location, format, silence, clipping, and metadata before a long session.
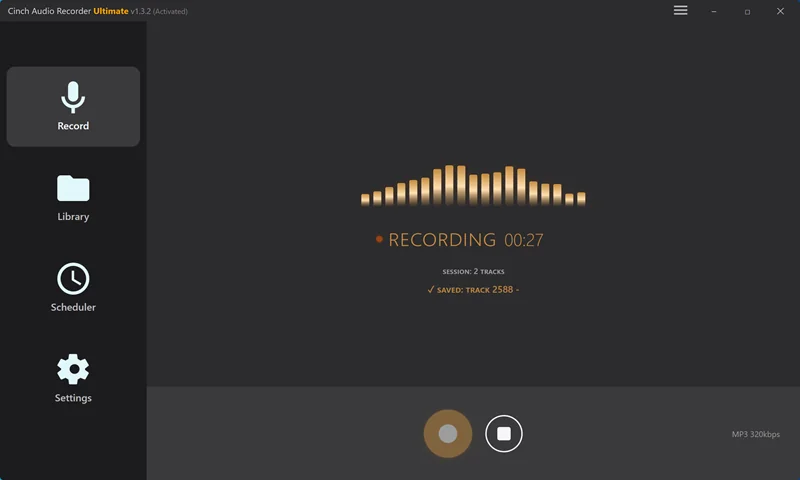
A long recording should never be the first proof that your setup works. Test first, then record.
The goal of a preflight test is simple: make a short file with the same source, output device, recorder, format, and folder you will use later. If that file plays correctly, the full session has a much better chance. If it fails, you have a small problem to fix instead of a long file to rescue.
The Short Answer
Use this five-minute test before a long recording:
- Open the exact source you plan to record.
- Choose the speaker, headphone, or output device you will keep connected.
- Turn on Do Not Disturb.
- Pick the output folder and format.
- Record 30 to 60 seconds.
- Play the saved file.
- Check volume, silence, clipping, source accuracy, and file location.
- Start the full session only after the test file is usable.
If the test recording is wrong, do not continue. Fix the setup and test again.
What a Good Test Proves
| Test Item | What It Proves | If It Fails |
|---|---|---|
| Source is playing | The correct tab, app, stream, or player is active | Start playback before recording |
| Right device is selected | The recorder follows the same route you are hearing | Recheck output and capture device |
| File has sound | The route is not silent | Use the no-sound checklist |
| Level is usable | The file is not too quiet or distorted | Adjust source volume or re-record |
| No alerts appear | The environment is quiet enough | Close noisy apps and enable Do Not Disturb |
| File saves where expected | You can find the result later | Choose the output folder before the real session |
| Format is practical | The full file will be usable and not oversized | Change format before recording for hours |
This is different from a quick “does the record button work?” check. A useful test proves the real workflow.
Step 1: Test the Real Source
Do not test with one source and record another. Browser tabs, music apps, meeting tools, and radio pages can route sound differently.
Before recording:
- Open the exact source page or app.
- Play a familiar section with clear audio.
- Confirm that the audio is coming through the device you will keep connected.
- Avoid switching from speakers to Bluetooth, HDMI, or a dock after the test.
If you need the broader setup routine for long streams, use the best settings for long audio recording guide.
Step 2: Record 30 to 60 Seconds
Ten seconds is enough for a quick first test. For a long session, use 30 to 60 seconds so the file has enough material to check level, silence, and the actual content.
Use the same recorder and settings you plan to use later:
- Start the source playback.
- Start recording.
- Let the source play normally.
- Stop the recorder.
- Save the file or confirm it appears in the Library.
If you use Cinch Audio Recorder, make the test inside the same workflow you will use for the full session. Confirm the saved result before moving to a playlist, show, webinar, or class recording.
Step 3: Play the Test File Back
Playback is the part people skip. Do not skip it.
Listen for:
- The correct source.
- No silence at the start.
- No notification sounds.
- No obvious distortion.
- Enough volume for comfortable listening.
- No channel problem, such as one side missing.
- A filename and folder you can find later.
For music or radio, also check whether the file is one continuous capture or a fragment. For spoken audio, check whether the first words are cut off.
Step 4: Run a Quick Quality Check
After listening, use the Recording Quality Checker when you want a second pass on the file.
It can help flag:
- Mostly silent files.
- Clipping risk.
- Very low level.
- Long quiet sections.
- Channel mismatch.
- Duration and file-size expectations.
This does not replace listening. It gives you a fast way to decide what to inspect before the full session.
Step 5: Decide Whether to Continue
Use this decision table.
| Test Result | Continue? | What To Do |
|---|---|---|
| Correct source, clean level, easy to find | Yes | Start the full recording |
| Silent file | No | Follow the no sound recorded checklist |
| Wrong app or tab | No | Close or mute the wrong source, then test again |
| Notification sound in file | No | Turn on Do Not Disturb and close noisy apps |
| Too quiet | Maybe | Adjust source volume or plan to normalize a copy |
| Clipped or distorted | No | Lower source volume or re-record the test |
| File too large | No | Change format before a long session |
| Missing from expected folder | No | Fix output location first |
Do not use cleanup tools to hide a failed test unless the full session cannot be repeated. Re-recording a one-minute test is almost always better.
When to Use the Trial Before Buying
Use the trial as a workflow test, not just an installer check.
Before buying:
- Install from the Download Center.
- Record a short source you understand.
- Confirm the saved file plays correctly.
- Check whether the Library, format, metadata, and cleanup path fit your needs.
- Buy only when the test file matches the workflow you expect.
That is safer than buying first and discovering later that the issue was a device route, silent source, or wrong format.
Common Test Failures
The test file is silent
The most likely cause is a route mismatch. Confirm where the computer is playing sound, then make sure the recorder is listening to the matching system-audio route. The first recording troubleshooting guide walks through this.
The test file contains the wrong sound
Close background apps, mute unused tabs, and make sure the source you want is the only important sound playing.
The test file is too quiet
Raise the source volume moderately and test again. If the source itself is quiet but clean, you can try normalization later. Do not normalize clipped audio.
The file is huge
Change the format before recording the full session. MP3 or M4A is usually more practical for long listening files than WAV. The best audio format guide explains when lossless formats are useful.
The test worked, but the full session failed
Look for what changed after the test: sleep, Bluetooth, HDMI, browser tab, app volume, network buffering, or storage. A stable setup matters more as the session gets longer.
Related Guides and Tools
- Best settings for long audio recording
- First recording troubleshooting
- Recording Quality Checker
- Record online radio and long streams
- Best audio format for recording
- Download Cinch Audio Recorder
Frequently Asked Questions
How long should a test recording be before a long session?
Use 30 to 60 seconds for ordinary sessions. For a critical recording, test the same source, output device, format, and folder you will use for the full session.
What should I listen for in a test recording?
Check that the file contains the right source, is not silent, is not clipped, has enough volume, avoids notification sounds, and is saved where you expect.
Should I use a quality checker before recording for hours?
Yes, after the short test. A quality checker can flag silence, clipping, quiet level, and channel issues before you commit to a long session.
Should I buy recording software before testing?
No. Install the trial, make a short recording, and only buy when the saved file matches the workflow you need.